My Tech Stack 2026 (Front-end)
The front-end tools I use to build software and why I chose each one.

This is part 1 of a series on my tech stack. The entire stack costs me just under £5/month to run. The only service I actually pay for is Namecheap, to rent my website domains.
I've got a student plan for Figma & credits for MongoDB, which I don’t even use. For the rest, I continue on the free tier, as it’s more than enough for me.
This first part covers the front-end. When I first made aryangohil.com I coded the entire site in plain JavaScript, CSS, and HTML. I used a stylesheet linked in the <head> tag and wrote an entire script.js file just so I could have an animation when the user entered the website. You can find my old website design on GitHub.
It was extremely messy and took me almost 3 weeks of nonstop coding to finish the website, making it look nice with animations, page routing for blogs, mobile-friendly UI, and more.
But after learning TypeScript, Next.js, and Tailwind CSS, I managed to remake aryangohil.com in about 3 days.
TypeScript > JavaScript
For Upvoted, my first SaaS, I built the project in JavaScript. As the project grew, so did the codebase, which had multiple API routes, pages, and React components (more on them later). This quickly became hard to keep on top of.
That's when I read about TypeScript, a superset of JavaScript with benefits such as:
- Errors found at compile time, instead of runtime.
- When a function return type changes, it flags every file that now breaks.
- Variable nullability safety.
So I spent around 3 days migrating the entire codebase to TypeScript. Below is a snippet of code for when a post is made on someone's Upvoted board:
interface CardPostProps {
  post: {
    _id: string | number;
    title: string;
    description: string;
    votesCounter: number;
    status?: PostStatus;
  };
}

const CardPost = ({ post }: CardPostProps) => {
  // ...
};
As you can see, I can now clearly define each variable's type and see which ones make up a post, such as votesCounter.
In my opinion, it's very useful and should be the default for building apps. So if you're new to making apps, learn TypeScript.
Next.js
Next.js is a React framework to build apps. So to fully understand what it is, let’s first go over React.
Quick overview
React is a JavaScript library to help build user interfaces. It lets you break down a webpage into reusable components (buttons, cards, etc.).
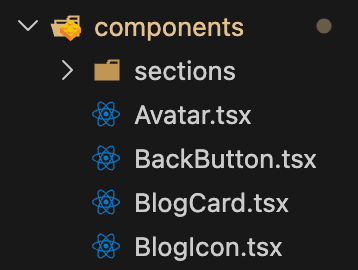
Making it easy to refactor large amounts of code and isolate errors.
What are .tsx files?
React components are written as .tsx files, the TypeScript version of .jsx. It lets you write HTML-like syntax directly in your code while also getting TypeScript's type-checking. This makes building UI much simpler than writing it out in plain JavaScript.
Below are examples of creating a simple button:
- Without React, using plain JavaScript and CSS:
<!doctype html>
<html lang="en">
  <head>
    <title>Personal Website</title>
    <link rel="stylesheet" href="/styles.css" />
  </head>
  <body>
    <div id="button">Click me</div>
    <script src="script.js"></script>
  </body>
</html>- With React and Tailwind CSS:
export default function Button() {
  return (
    <main>
      <button className="bg-blue text-white">Click me</button>
    </main>
  );
}
As you can see, we just used the HTML-like <button> tag and Tailwind CSS (adding a blue background and white text) for styling, which makes the code easier to understand.
Where React falls short
React doesn’t handle how the app is actually built. That is where Next.js comes in.
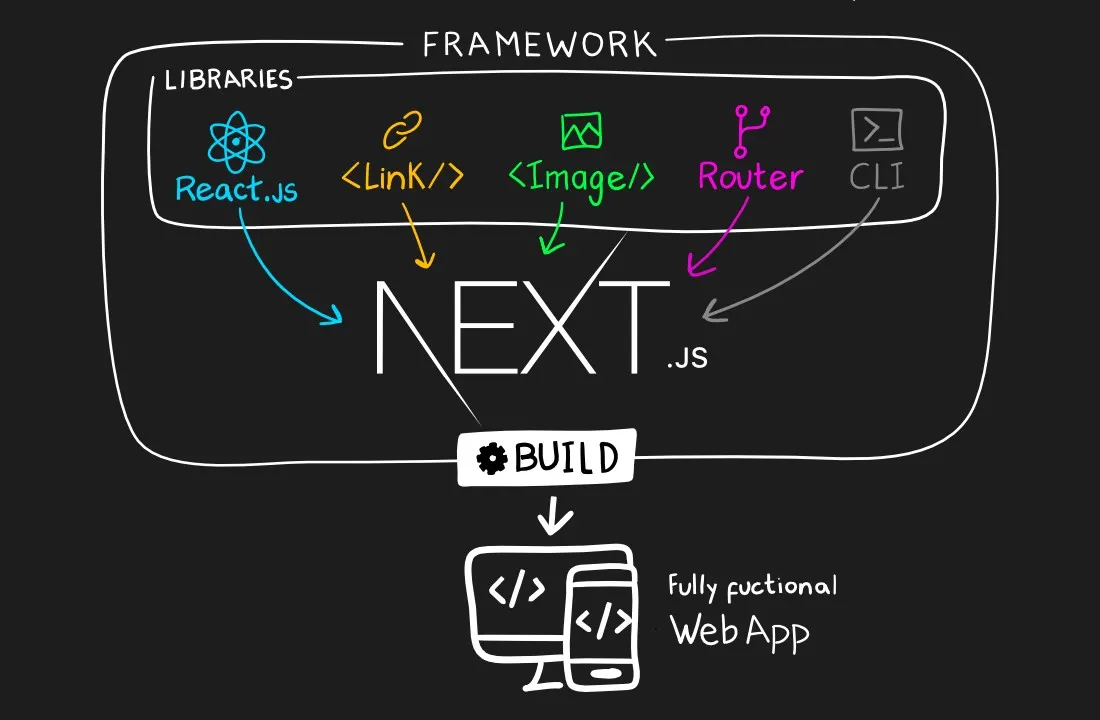
Next.js is a framework that handles everything else, such as API endpoints, file-based routing, image/font optimisation, server-side rendering, and more.
Pages
A page in Next.js is just a file named page.tsx sitting inside a folder under app/. The name of the folder becomes the URL, so app/blog/page.tsx gives you https://aryangohil.com/about, with no router setup to write.
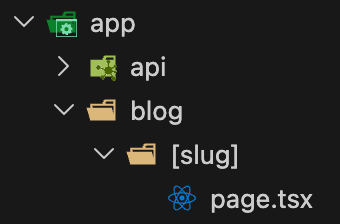
Folders in square brackets, like [slug] (see above) are dynamic, meaning they match any value in that position of the URL. That's exactly how this site's blog posts work: app/blog/[slug]/page.tsx matches /blog/tech-stack-front-end, /blog/tech-stack-back-end, or any other post slug, and the page grabs whatever text was in the URL to look up the right post to display it.
In short, React renders the UI, and Next.js turns that UI into a fully working app.
For Upvoted, this meant handling my UI, backend API routes, and SEO all within one project, without needing to manage a separate server or router setup.
Tailwind CSS > Plain CSS
I touched on this earlier, but let's properly compare the two. Here's what we're building, a simple alert box:
Your changes have been saved.
- With plain CSS:
.alert {
  max-width: 360px;
  border-radius: 12px;
  border: 1px solid #86efac;
  background: #f0fdf4;
  padding: 1rem 1.25rem;
}

.alert__text {
  color: #166534;
  font-size: 0.875rem;
}<head>
<link rel="stylesheet" href="/styles.css" />
</head>
<div class="alert">
<p class="alert__text">Your changes have been saved.</p>
</div>- With Tailwind in Next.js:
export default function Alert() {
  return (
    <div className="max-w-sm rounded-xl border border-green-300 bg-green-50 p-4">
      <p className="text-sm text-center text-green-800">
        Your changes have been saved.
      </p>
    </div>
  );
}import Alert from "./Alert";
export default function Page() {
return (
<main>
<Alert />
</main>
);
}Same result, better readability, no class names to invent, and the styling sits next to the markup it affects.
DaisyUI
I use DaisyUI so I don't have to design each component on my site by scratch. It was inspired by entrepreneur Marc Lou's tech stack. It’s a free, open-source component library built on top of Tailwind CSS. Instead of writing lots of classes, it gives you pre-built class names like ‘btn’ or ‘dropdown’ that already come with pre-styled defaults.
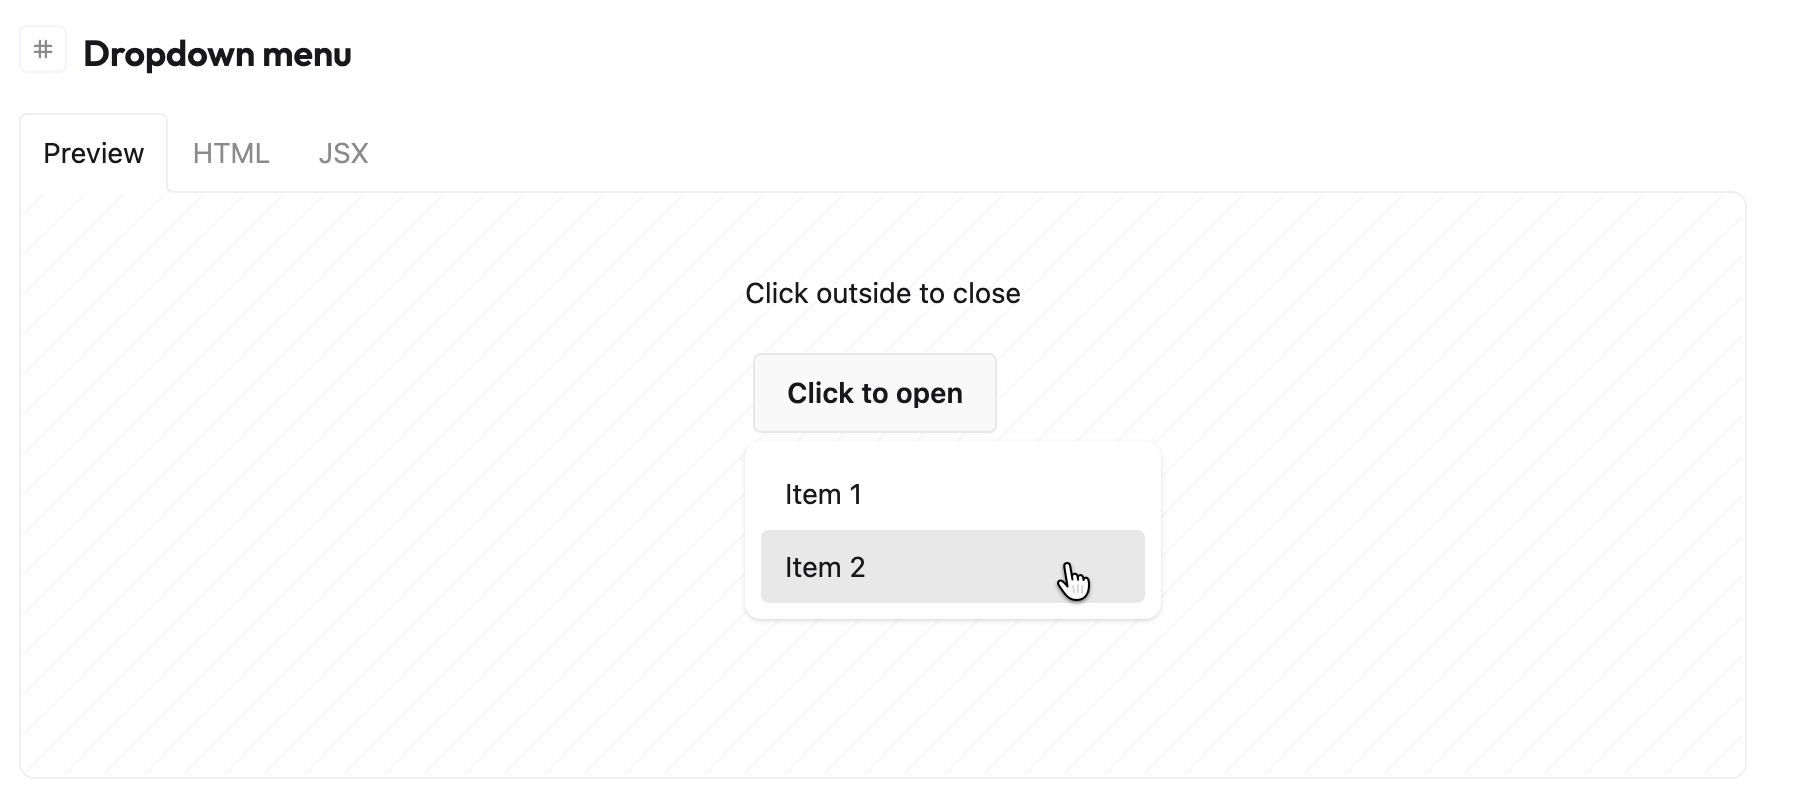
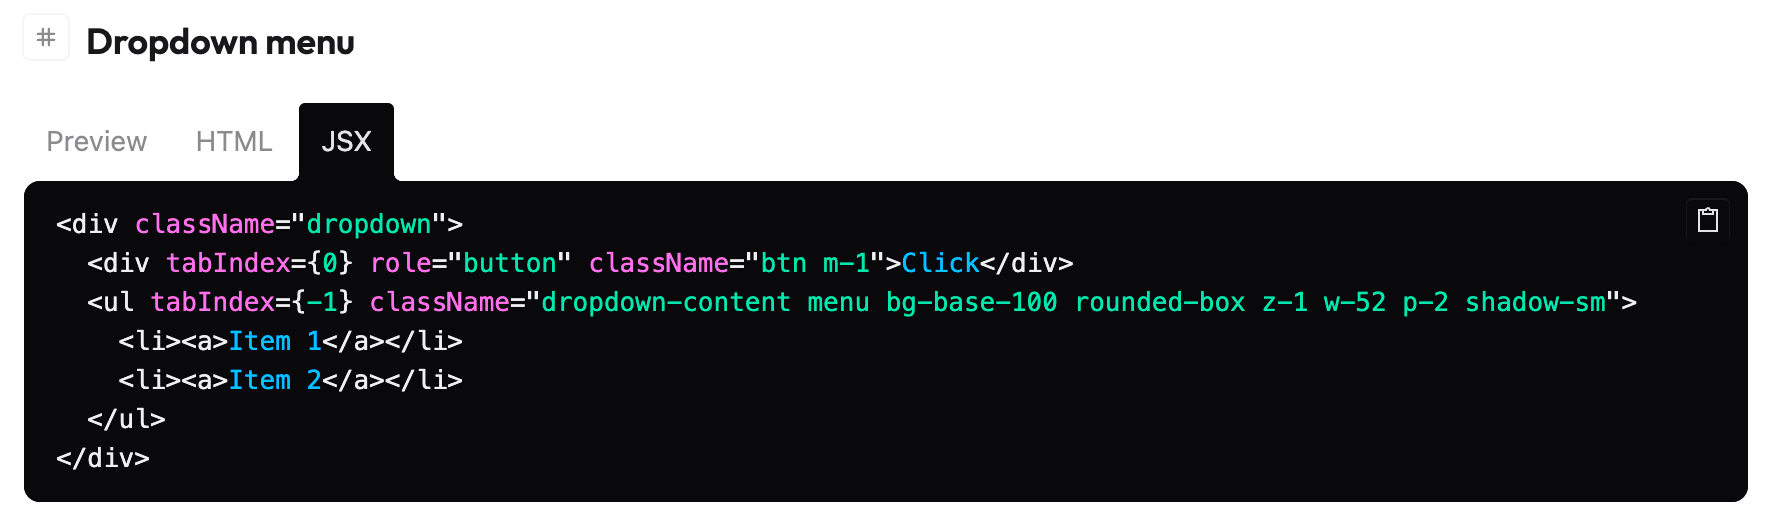
As you can see above, to get a drop-down menu, all you need to do is set up DaisyUI in your app then simply copy & paste the code into the page. There are a bunch of different components like browser mockups, toggles, and theme controllers. I recommend you go through them to get inspiration for your app.